
A high-quality filtration system is an absolute must when keeping your aquarium clean. Not only does it ensure the health and well-being of your aquatic pets, but it also helps maintain your tank’s overall aesthetic.
Plenty of commercial filtration options are available. However, they can be expensive, so many people opt for a DIY canister aquarium filter. Not only does building your filter offer the opportunity to save money, but it also allows you to create a system that is tailored to the specific needs of your tank.
Initially, the process may seem daunting, but anyone can create a professional-grade canister filter in their home with the right guidance and materials. In this ultimate guide, we will take you through every step of the process, from selecting the appropriate materials and equipment to assembling and maintaining your filter.
About Canister Filters
Canister filters are popular among hobbyists because they provide superior filtration and can easily handle larger aquariums. Canister filters are highly effective filtration systems in aquariums and other aquatic environments.
These filters draw water through an inlet tube into a pressurized container, which houses various filter media. The water is then forced through the media, purified and cleaned before being released into the tank.
Canister filters are known for removing waste, debris, and harmful bacteria from the water, making them a crucial component of any aquatic environment. Making your canister filter may seem intimidating, but it’s a relatively simple process that can save you a lot of money.
Types Of DIY Canister Filters
DIY canister filters are popular among enthusiasts who want to save money and customize their filtration system. There are several DIY canister filters, each with benefits and drawbacks. DIY canister filters are a great way to keep your aquarium clean and healthy. They are relatively easy to build and can tailor to fit the specific needs of your tank. The following types of canister filters are some of the most popular DIY options for aquariums:
- The simplest type of DIY canister filter is the gravity-fed filter.
- Another type of DIY canister filter is the powerhead-driven filter.
- Finally, pump-driven DIY canister filters. They use a separate pump to push water through the filter media.
How To Build A Homemade Diy Canister Aquarium Filter For Fish Tank
A homemade DIY canister filter might be the perfect solution if you’re looking for an affordable and efficient way to filter your fish tank. Building one is easier than you might think and can do with just a few basic supplies. Canister aquarium filters are an excellent way to improve the health of your fish and keep your aquarium clean and clear. There are numerous benefits to using a DIY canister filter.
- Firstly, they are very cost-effective, as you can use readily available materials to create a filter that works just as effectively as a store-bought one.
- Secondly, DIY canister filters are highly customizable, which means you can modify them to suit the specific needs of your aquarium. For instance, you can adjust the flow rate to match the size of your tank or add more media to increase the filtration capacity.
- Thirdly, DIY canister filters are easy to maintain and clean. Since you are the one who built the filter, you already have a good understanding of how it works, making it easier to troubleshoot any problems that may arise.
- Finally, DIY canister filters are a great way to learn new skills and learn about aquarium filtration mechanics.
Tools And Materials Required
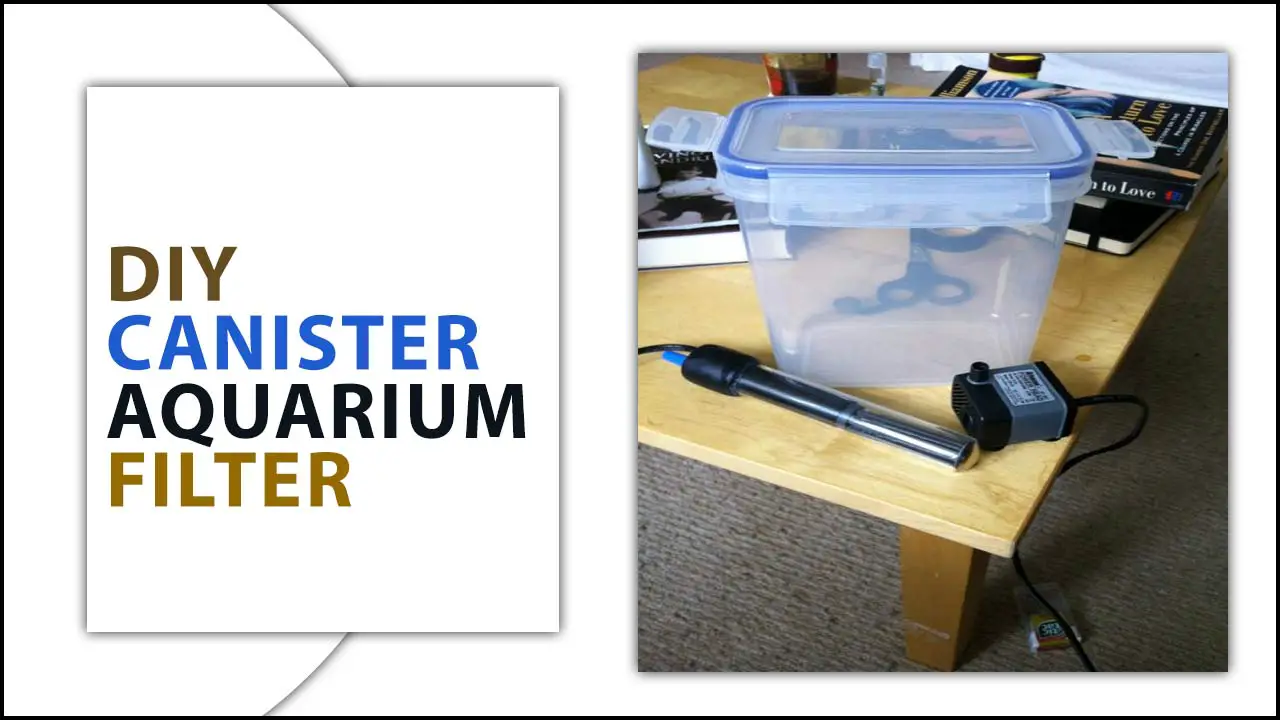
Building a DIY canister aquarium filter is a great option if you’re looking for a cost-effective way to clean your aquarium water. All you need is a few basic tools and materials to get started. First, you’ll need a plastic container to hold your filter media.
You can use anything from a small plastic bin to a large food storage container, depending on the size of your aquarium. Next, gather some PVC piping, a water pump, and aquarium filter media, like bio-balls or filter floss.
To assemble the canister filter, you’ll need a drill with a hole saw attachment to cut holes in the container for the PVC piping and a hot glue gun to seal the holes. And some silicone sealant to secure the water pump in place. Once you have gathered all your tools and materials, it’s time to get to work.
Building The Canister Body
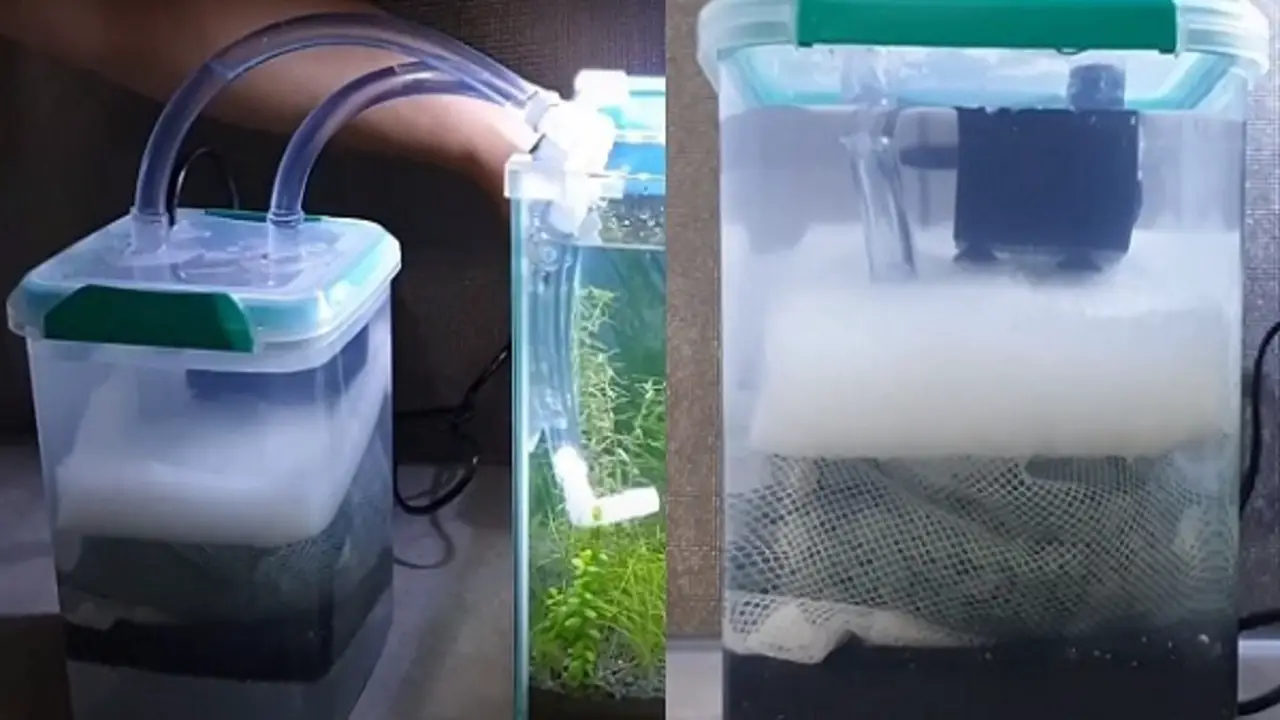
Building your canister aquarium filter can be fun and rewarding for any enthusiast. The canister body is one of the most important steps in creating your filter. This is where all the filtration media will be housed, so it needs to be sturdy and leak-proof.
First, choose a large container to hold all the filtration media you plan to use. Plastic containers are popular because they are lightweight and easy to work with. Next, drill holes in the container for the inlet and outlet pipes.
These pipes will be used to circulate the water through the filter. To create a watertight seal, use a silicone sealant around the holes, and attach the pipes using PVC fittings. Once the pipes are attached, you can begin adding the filtration media. To create a multi-stage filtration system, you can use various materials, such as a sponge, filter floss, and bio media.
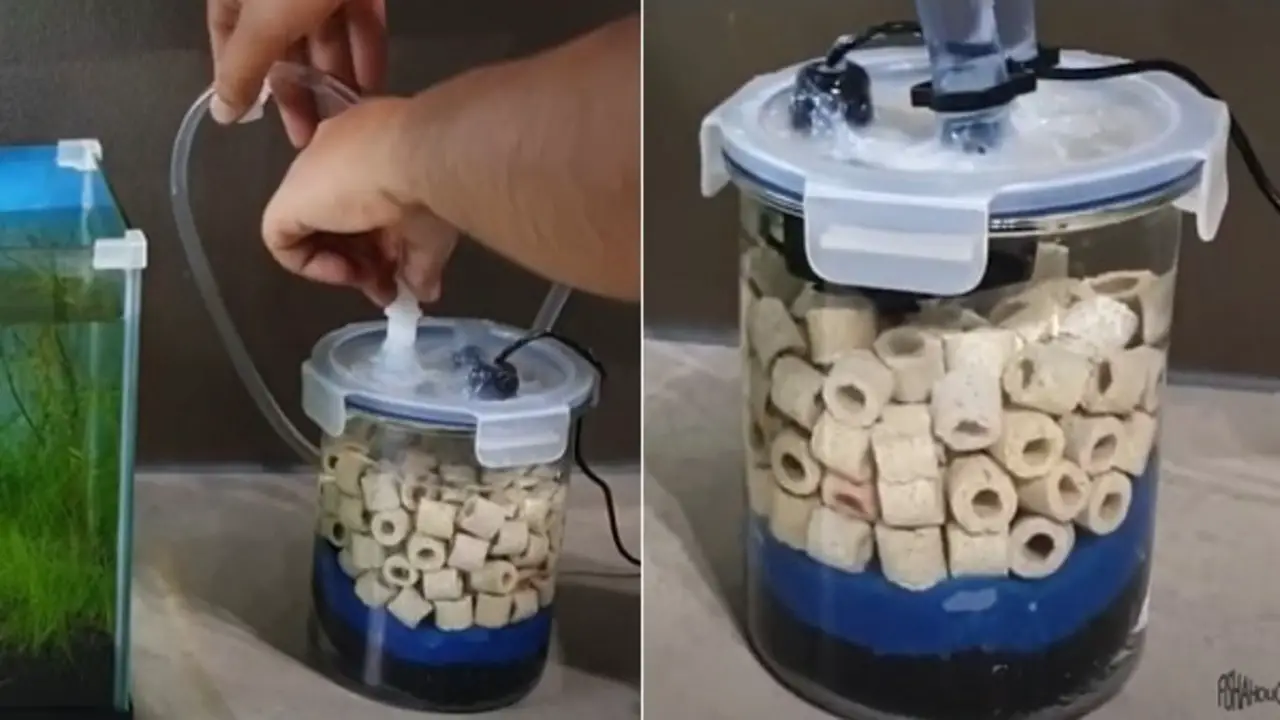
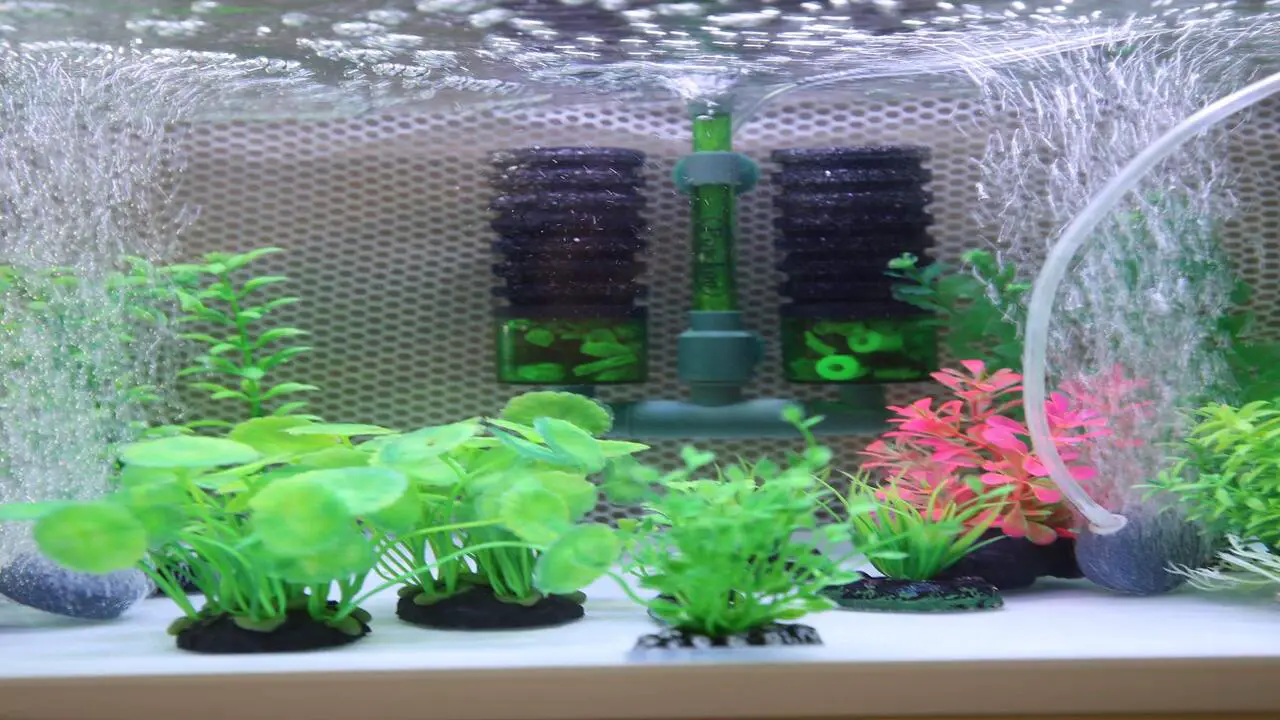
Installing The Filter Media
Once you’ve constructed your filter, installing the filter media is next. This is an essential component of any aquarium filter, as it acts as the main water filtration source. The type of filter media you choose will depend on the specific needs of your aquarium but typically includes materials such as filter floss, activated carbon, and ceramic rings.
To install the media, begin by layering the materials inside the filter in the order recommended by the manufacturer. Pack the media tightly to prevent water from bypassing the filter, and avoid overfilling the canister to ensure proper water flow.
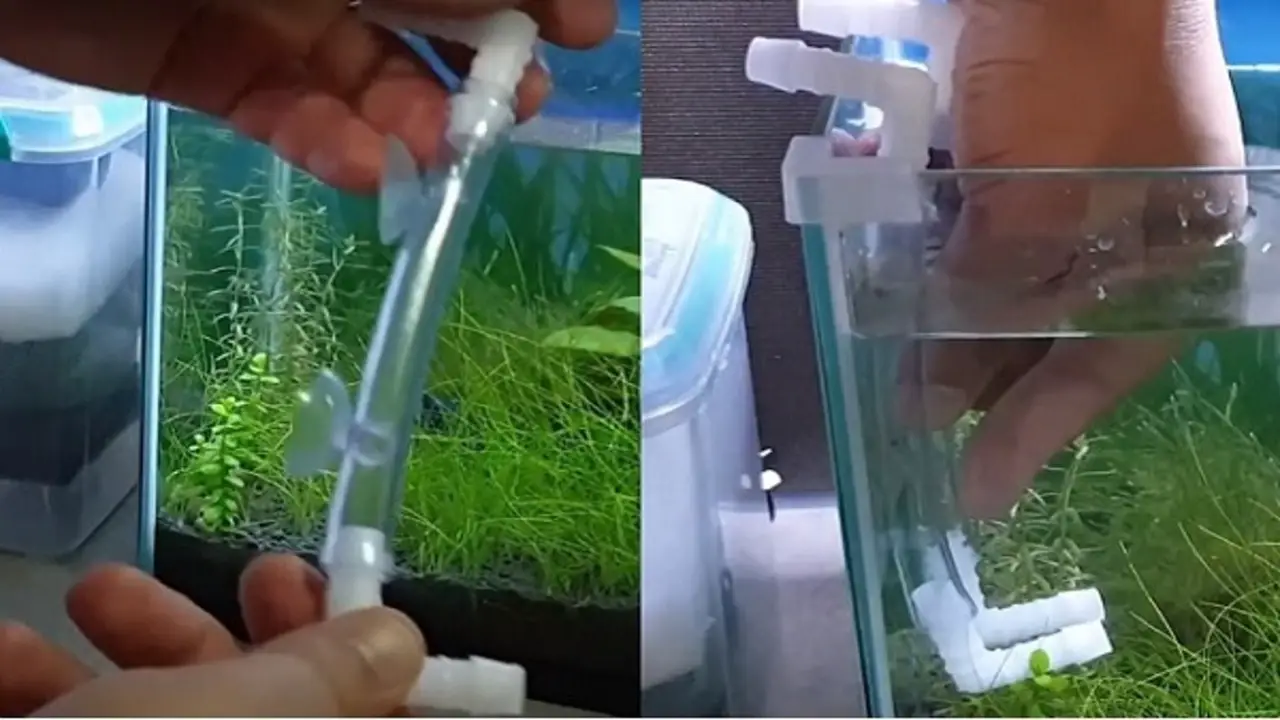
Creating The Water Inlet And Outlet
Begin by measuring the size and location of the inlet and outlet on your aquarium, then cut the PVC pipes to the appropriate lengths. Next, drill holes in the sides of the pipes near the top and bottom. These holes will allow water to flow in and out of the filter.
Then, attach PVC elbows to the ends of the pipes to create a 90-degree angle. Once the elbows are firmly attached, connect a piece of PVC tubing to the outlet pipe. This tubing will lead water from the filter back into the aquarium. Then, attach a water pump to the inlet pipe to help circulate water through the filter. With the water inlet and outlet in place, proceed to the next step.
Attaching The Pump And Tubing
Next, attach the pump to the canister lid using screws or a strong adhesive. Then, insert the tubing through the holes in the lid and attach it to the pump. Before adding the filter media, it’s important to rinse it thoroughly to remove any debris or dust. After that, simply place the filter media into the canister, connect the tubing to the intake and outflow valves, and turn on the pump.
Securing The Lid And Sealing The Canister
Securing the lid is crucial as it ensures the filter operates smoothly without interruptions. Finally, seal the canister with silicone to prevent any water leaks. Once you have completed these steps, plug in the water pump and let the filter run for a few hours to ensure it is working adequately.
Testing And Troubleshooting
You can easily create your filter using materials around your house or find it at a hardware store. However, before you add your fish to the tank, it’s important to thoroughly test and troubleshoot your new filter. Testing your filter before adding it to your tank is crucial to ensure it’s working properly. You’ll want to fill the canister with water and test the flow rate.
This will give you a good idea of how much water is filtered per hour. Additionally, you should run the filter for a few days to see if any issues arise, such as leaks or clogs. If you encounter issues with your canister aquarium filter, you can take several troubleshooting steps.
- First, check to ensure all connections are tight and there are no leaks
- Ensure that all hoses and connectors are tightly secured and that there are no leaks or blockages. A leak in the filter system can cause a drop in water pressure, resulting in the filter failing to function correctly.
- Additionally, a blockage in the filter’s intake or output hoses can cause a reduction in water flow, leading to ineffective filtration and poor water quality.
- You can identify and resolve issues with the canister filter’s performance by thoroughly checking all connections.
Safety Precautions
Remember a few important safety precautions when setting up a DIY aquarium filter. With these precautions in mind, setting up a DIY canister aquarium filter can be a rewarding and cost-effective way to maintain a healthy and thriving aquarium environment.
- First and foremost, it’s important to ensure that all the materials and equipment you use are safe for aquatic life. This means using non-toxic materials, ensuring electrical components’ sealing properly, and protecting them from water.
- Additionally, it’s important to take precautions when handling sharp objects or tools. And when working with any chemicals or substances that could be harmful if ingested.
- It’s also important to carefully follow instructions or guidelines for setting up your filter to ensure it functions properly. And does not pose any risk to your fish or other aquatic life.
Maintenance And Cleaning
A canister aquarium filter is a great way to save money while maintaining a clean and healthy environment for your fish. However, regular maintenance and cleaning are crucial to ensure the filter runs smoothly and effectively. The first step is to turn off the filter and unplug it from the power source before disassembling it. Then, remove the filter media and rinse it with tap water.
If you used heavily soiled media, it may need to replace. Next, use a brush or sponge to clean the inside of the canister and tubing. Be careful not to damage any of the components during the cleaning process. Once everything is clean, reassemble the filter and fill it with water before turning it back on. It’s important to check the filter regularly for any signs of damage or wear. And tear, as this could affect its performance.
Advanced Modifications For Customization
For aquarium enthusiasts, DIY projects can be both fun and cost-effective. One popular project is creating a canister aquarium filter from scratch. Using materials such as PVC pipes, filter media, and a pump, you can build a custom filter that suits your aquarium needs. However, you can make advanced modifications for further customization for those looking to take their DIY skills to the next level.
For example, adding a UV sterilizer or a CO2 diffuser can enhance the filtration process and improve the overall health of your aquatic creatures. You can also modify the filter’s flow rate, adjust the media configuration, or even incorporate a water heater into the design.
The possibilities are endless, and the satisfaction of creating a one-of-a-kind filtration system is priceless. It’s important to note that advanced modifications may require additional research and technical knowledge. Still, the process can be educational and rewarding with the help of online resources and forums.
Comparison Between DIY Canister Filters And Commercial Canister Filters
Aquarium enthusiasts always search for the best filtration system to maintain a healthy and thriving aquatic environment. Two popular options are DIY canister filters and commercial canister filters. DIY filters are a cost-effective alternative to expensive commercial filters.
These filters are easy to construct using spare parts such as PVC pipes, hoses, and filter media. With a little effort and creativity, you can create a DIY filter that is just as efficient as a store-bought version.
DIY and commercial canister filters offer reliable aquarium filtration, but a few key differences between them should be noted. Each type of canister filter has its own advantages and disadvantages, so it’s important to weigh the pros and cons of each when making a decision.
- DIY canister filters can be more cost-effective, and they can also be more customizable.
- Commercial canister filters tend to come pre-filled with filtration media and can be more reliable, but they are often more expensive.
- DIY canister filters allow for a great deal of customization. They can be filled with whatever type of filtration media you like, from activated carbon to speciality media.
- You can also customize the flow rate of your filter, adding more or less media to increase or decrease flow.
- DIY canister filters are also usually cheaper than commercial canister filters.
However, it is essential to note that DIY filters have a few downsides.
- For instance, if not assembled correctly, they may leak and cause damage to your aquarium.
- On the other hand, commercial canister filters are built with advanced technology. With high-quality materials designed to provide optimal filtration for your tank. They are easy to set up, operate, and maintain.
Conclusion
A DIY canister aquarium filter is a great way to save money and have control over the filtration system in your aquarium. It’s easy to make and can customize to meet your fish’s specific needs. You only need a plastic container, a water pump, filter media, and tubing. Simply drill holes in the container, install the pump and tubing, and fill it with your chosen filter media.
Various filter media options include sponges, ceramic rings, and bio-balls. You can also add activated carbon or other chemical filtration media if needed. Not only will this save you money, but it will also give you the satisfaction of knowing you built something yourself. So, get your tools ready, gather your materials, and let your imagination run wild.
FAQ
What Materials Are Needed To Make A Canister Aquarium Filter?
The materials needed to make a canister aquarium filter may vary depending on the design and method. Still, some common materials include a plastic container or canister, filter media such as foam or sponge, tubing, a pump, and plumbing fittings. Other optional materials may include valves, connectors, and sealants.
How Difficult Is It To Assemble A Canister Aquarium Filter?
The difficulty level of assembling a canister aquarium filter can vary depending on the individual’s experience and skill level with DIY projects. However, it usually requires a basic understanding of plumbing and electrical work and the ability to follow instructions and use tools.
What Are The Benefits Of Using A Canister Aquarium Filter Compared To A Store-Bought Filter?
There are several benefits to using a DIY canister filter compared to a store-bought filter, including:
1.Cost-effectiveness
2.Customizability
3.Efficiency
How Often Do You Need To Clean A Canister Aquarium Filter, And What Is The Process For Cleaning It?
The process of cleaning a canister aquarium filter involves the following steps:
1.Turn off the filter and unplug it from the power source.
2.Remove the filter media from the canister and rinse it with aquarium water to remove debris and waste.
Can A Canister Aquarium Filter Be Customized To Fit Different Tank Sizes And Types Of Fish?
The design and size of the filter media can be adjusted to accommodate the fish’s specific needs and the tank’s water volume. The filter’s flow rate can also be adjusted to ensure proper filtration and circulation.

Aquarium passion is all about connecting with the aquatic life and providing education to the public on the importance of these creatures. We showcase a wide variety of marine life through our exhibits as well as working with schools to provide unique learning opportunities for students of all ages.
